MailGun Integration Steps:
1. Register / sign-up with MailGun account
2. Add domain name to MailGun account
3. Add SPF and DKIM TXT records and verify domain name
4. Verify the registered email address in MailGun
5. Add domain and API key in EasySendy Pro Delivery Server
6. Validate Delivery Server in EasySendy Pro account
7. Confirm bounce and complaint files are setup properly
8. Add Tracking Domain to Your Dashboard
1. Register / sign-up with MailGun account
Register MailGun account from here: https://signup.mailgun.com/new/signup
2. Add domain name to MailGun account
a. Login to your “MailGun” account and select “Sending” >> “Domains” in dashboard.

In Free Trial account, you must use the system default domain, In case if you want to use the custom domain, you have to upgrade your plan in Mailgun Account. After upgrading the plan you can add your custom domain.
b. Click on “Add New Domain” button to add your custom domain.

c. Enter Domain name and click on “Add Domain” button.

3. Add SPF, DKIM and TXT records and verify domain name
a. After adding custom domain, Click on “DNS records” tab under “Domain setting” option.

b. Go to Domain Service Provider. (Go Daddy, NameCheap, Network Solutions etc)
c. Add the TXT records for SPF and DKIM in the domain service provider for the domain.
d. Finally, click on “Check DNS records Now” button on your right corner to verify the DNS records.
NOTE: Wait 24-48 hours for DNS record verification
4. Verify the sending email address in MailGun
To verify the “From” email address, click on “Validations” >> add your from email address and click “Validate Address” button.

5. Add domain and API key in EasySendy Pro Delivery Server
a. Login into Easysendy Pro account.
b. Click on Delivery Servers -> Go to “Create new delivery server“.

c. Select “Mailgun” delivery server.

d. Enter name as “MailGun”.
e. Paste as domain name in the EasySendy Pro.
f. Add the verified “From email“, “API key” and “From name“.
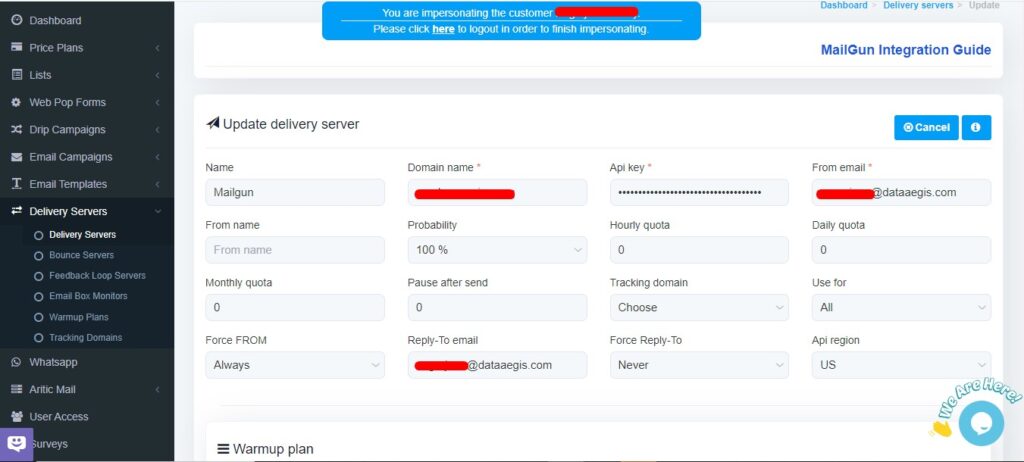
g. To copy API key, login to “Mailgun” dashboard >> click “Settings” >> select “API keys”. Copy this API key and paste it in your “EasySendy” account in the “API key” field.

h. Finally, click on “Save Changes” button.
6. Validate Delivery Server in EasySendy Pro account
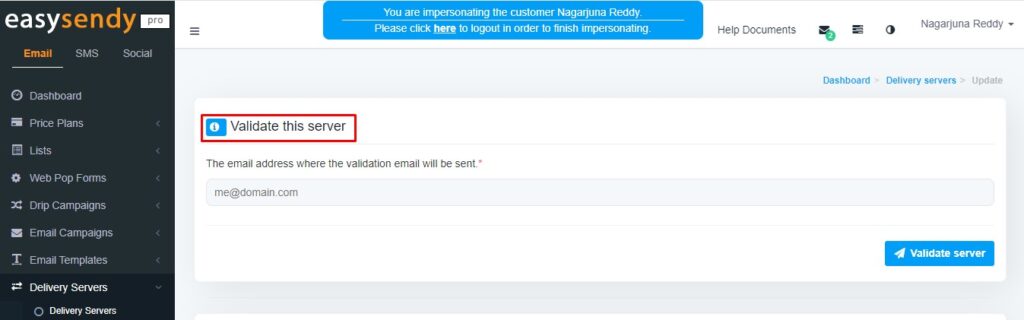
a. Enter “Email Address” and click on “Validate Server” button.

b. Go to Mail and click on the verification link to validate the server.

d. After verification, the Delivery Server status in the Easysendy Pro should change as “Active“.

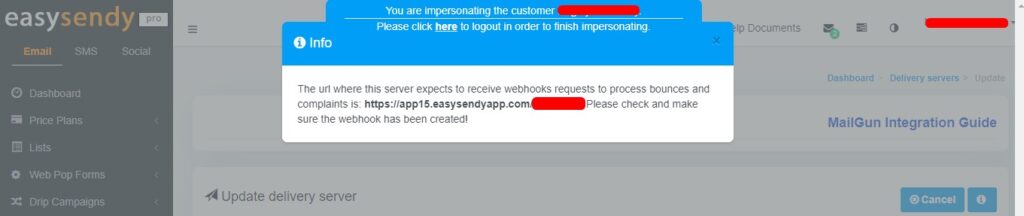
7. Confirm bounce and complaint files are setup properly.
a. In your MailGun account, click “Sending” option >> and select “Webhooks” option and check whether webhooks for the easysendy account is created or not.

b. To check the given webhooks inside EasySendy Pro, go to delivery server > edit the server > click on “Info” tab from the right corner of the screen.
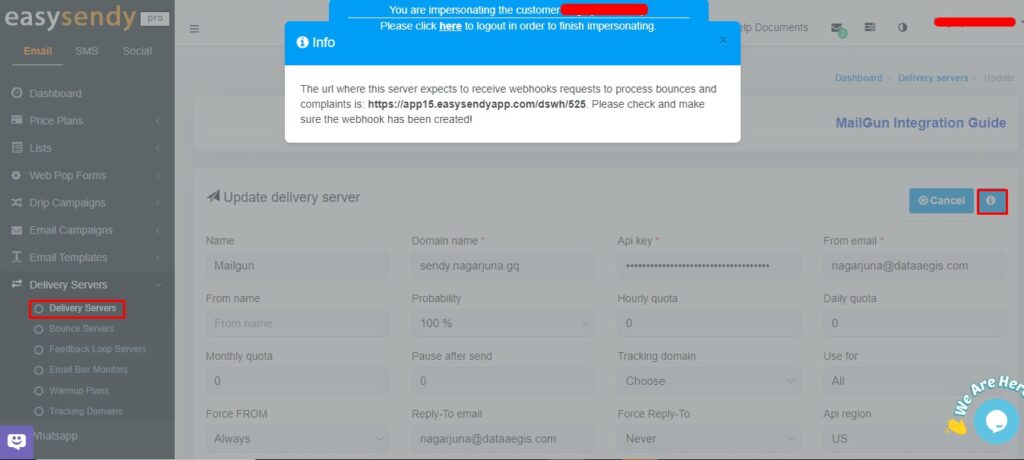
c. In the new pop-up box, you will get the details about how to setup the webhooks and the EasySendy Pro links.
Add Tracking Domain to Your Dashboard
Note: You need to add and activate your own tracking domain to your EasySendy Dashboard account for good email delivery. Follow this link, to configure your own tracking domain to your EasySendy Dashboard.
Recent Comments